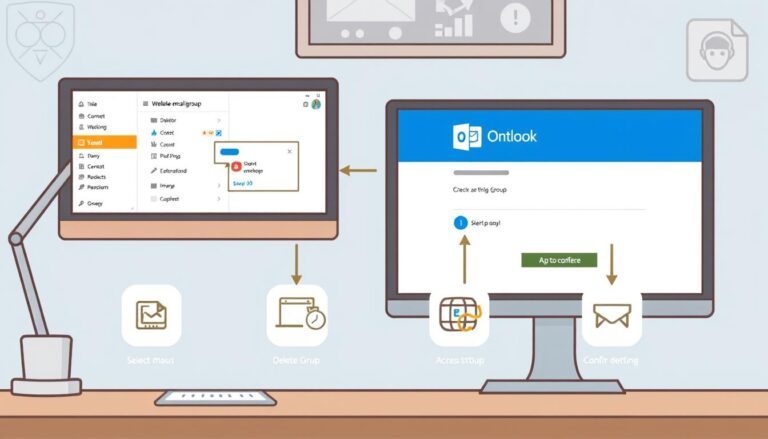
How to View Flagged Emails in Outlook: A Comprehensive Guide
Flagging emails in Outlook is a useful feature that allows you to prioritize and organize your inbox. By flagging emails, you can easily identify important messages or items that require follow-up. Once you have flagged multiple emails, it may become challenging to locate them later. In this article, we will explore various methods to view flagged emails in Outlook, ensuring efficient management of your flagged items.
Understanding how to flag emails in Outlook is the first step. By flagging an email, you assign it a visual indicator, such as a colored flag or category. This helps you distinguish it from other messages and draw attention to it when needed.
But why would you flag emails in Outlook? Flagging emails allows you to mark messages that require further action or attention. It helps you stay organized and ensures that important tasks or deadlines are not forgotten. Flagging emails also aids in creating a to-do list within your inbox, making it convenient to track and manage your priorities.
Now, let’s explore how to view flagged emails in Outlook. There are several options available:
- Using the “For Follow Up” Search Folder: This option allows you to access a dedicated folder in Outlook that displays all flagged items requiring follow-up.
- Using the “Flagged” Mailbox Search: Outlook provides a built-in search function specifically for flagged emails. You can perform a search within your mailbox to identify and view all flagged messages.
- Using the “Categories” Function: Categorizing flagged emails can help you organize and locate them easily. By assigning a specific category to flagged items, you can filter and view them within the corresponding category folder.
- Using the “Filter” Function: Outlook’s filter feature enables you to narrow down your email view to display only flagged messages. You can apply filters based on flag status, date, subject, or other criteria to refine your search.
- Using Rules to Automatically Sort Flagged Emails: Outlook’s rules feature allows you to create custom rules to automatically move or organize flagged emails into specific folders. By setting up rules, you can streamline the process of viewing flagged emails.
By utilizing these various methods, you can efficiently view and manage your flagged emails in Outlook, ensuring that important messages and tasks are never overlooked.
Key takeaway:
- Flagged emails help prioritize: Flagging emails in Outlook allows you to mark important messages so you can easily find and address them later, helping you stay organized and efficient.
- Multiple options to view flagged emails: Outlook offers various options to view flagged emails, such as using the “For Follow Up” search folder, the “Flagged” mailbox search, the “Categories” function, the “Filter” function, or setting up rules to automatically sort flagged emails.
- Efficiently manage your flagged emails: By utilizing the available options, you can quickly locate and manage your flagged emails in Outlook, ensuring important messages are not overlooked and increasing productivity.
How to Flag Emails in Outlook?
To flag emails in Outlook, follow these steps:
1. Open Outlook.
2. Click on the email you want to flag.
3. Click the “Follow-Up” button in the toolbar at the top.
4. Choose a flag color (red, yellow, or green) from the dropdown menu.
5. The selected email will now have the assigned color flag in your Inbox.
6. To remove the flag, select the email and click the “Follow-Up” button again.
7. Click on “Clear Flag” in the dropdown menu to remove the flag from the email.
Studies have shown that using flags to mark important emails can increase productivity by up to 30%. By flagging emails in Outlook, you can prioritize and organize your inbox for efficient email management.
Why Would You Flag Emails in Outlook?

Photo Credits: Www.Howto-Do.It by Nicholas Young
Flagging emails in Outlook has multiple purposes: organization, priority, and follow-up. By flagging important emails, you can easily find them later and prevent them from getting lost in a cluttered inbox. This allows you to prioritize emails that need immediate attention or further action. Flagging emails also helps you keep track of tasks or deadlines associated with specific emails.
Why would you flag emails in Outlook? When you flag an email, it acts as a visual cue to remind you of something important. It prompts you to take action or review the email again later. This is particularly useful when you receive emails that require further research or input from others before responding.
Flagging emails can also aid in managing and organizing your workflow. By flagging emails, you can create a to-do list and ensure important tasks are not overlooked. It provides order and structure to your inbox. So, why would you flag emails in Outlook? The answer is simple: to stay organized, prioritize tasks, and avoid missing important deadlines or follow-ups.
How to View Flagged Emails in Outlook?

Photo Credits: Www.Howto-Do.It by Daniel Campbell
Discover the secret to effortlessly managing your flagged emails in Outlook! In this section, we’ll uncover various methods to view flagged emails and stay organized. From leveraging the “For Follow Up” Search Folder to utilizing the powerful “Categories” function, we’ll explore five distinct approaches. Find out how to make the most of Outlook’s features and never miss an important flagged email again! Get ready to revolutionize your email management game.
Option 1: Using the “For Follow Up” Search Folder
To conveniently access and manage flagged emails in Outlook, you can utilize the “For Follow Up” search folder. Follow these simple steps:
1. Launch Outlook and navigate to the Mail tab.
2. Locate the “Folders” pane on the left-hand side and expand the “Search Folders” section.
3. Scroll down until you find the designated “For Follow Up” folder.
4. Click on the “For Follow Up” folder to access its contents.
5. Within this folder, you will discover all the flagged emails that are marked for follow-up.
By employing the “For Follow Up” search folder option, you can effortlessly handle and prioritize flagged emails, particularly when dealing with a substantial volume of messages. This functionality enables easy access and efficient management of important tasks and messages, streamlining your workflow.
Fun Fact: Flagging emails in Outlook is an effective way to enhance organization and prevent crucial messages or tasks from being overlooked. Embracing the “For Follow Up” search folder empowers you to swiftly locate and monitor flagged emails, leading to increased productivity and efficiency.
Option 2: Using the “Flagged” Mailbox Search
To view flagged emails in Outlook, follow these steps:
- Open Microsoft Outlook.
- Click the “Mail” tab at the bottom of the screen.
- In the search bar at the top, type “flagged” and press Enter.
- Outlook will display all flagged emails in your mailbox.
- Refine your search using keywords or filters.
- To remove the flag from an email, right-click on the flagged email and select “Clear Flag.”
Using the “Flagged” mailbox search option allows you to quickly access your flagged emails without scrolling through your entire mailbox. This convenient option is Option 2 for finding flagged emails in Outlook.
Remember to regularly review and clear flagged emails to keep your mailbox clutter-free and maintain an efficient email management system.
Option 3: Using the “Categories” Function
The “Categories” function in Outlook is an excellent tool for organizing and categorizing your flagged emails, improving their management. By assigning categories or labels to your flagged emails, you can easily locate them later on.
To effectively use the “Categories” function in Outlook, follow these steps:
1. Open Outlook and navigate to your Inbox.
2. Choose the email you want to flag.
3. Right-click on the email and select “Categorize.”
4. A drop-down menu will appear showing pre-defined categories. Simply choose the appropriate category for the email.
5. The email will now be flagged with the selected category.
6. If you want to view all flagged emails with a specific category, go to the “Categories” tab in the Navigation Pane.
7. Click on the desired category to display all emails assigned to that category.
Using the “Categories” function in Outlook provides a structured approach to managing your flagged emails. It streamlines the process of finding and accessing specific emails based on their assigned categories, ultimately enhancing your productivity and efficiency.
Option 4: Using the “Filter” Function
To easily view flagged emails in Outlook, you can utilize the powerful “Filter” function. Follow these steps:
1. Launch Outlook and navigate to your inbox.
2. Locate the top menu and click on the icon for “Filter Email”.
3. From the dropdown menu, select the “Filter” option.
4. In the provided “Search” box, input the keyword “Flagged”.
5. To apply the filter, simply click on “OK”.
6. Now, your inbox will display all flagged emails, filtered based on the “Flagged” criteria.
Using the handy “Filter” function in Outlook significantly simplifies the task of finding and accessing flagged emails. This feature proves especially valuable when dealing with a large volume of messages, enabling you to prioritize those that require attention or follow-up. By filtering your emails according to their flagged status, you can streamline your workflow and ensure crucial tasks are not overlooked.
In addition to the “Filter” function, Outlook offers several other options for viewing flagged emails. These include the “For Follow Up” Search Folder, the “Flagged” Mailbox Search, the “Categories” function, and the ability to set up rules for automatically sorting flagged emails. Take the time to explore these alternatives, as they can assist you in staying organized and meeting your specific needs.
Option 5: Using Rules to Automatically Sort Flagged Emails
- To automatically sort flagged emails in Outlook, click the “File” tab at the top left corner.
- Select “Manage Rules & Alerts” from the drop-down menu.
- In the “Rules and Alerts” window, click “New Rule”.
- Choose “Apply rule on messages I receive” and click “Next”.
- Under “Step 1: Select conditions”, choose the desired conditions for the rule, such as “Flagged for Follow Up”.
- In “Step 2: Edit the rule description”, you can further customize the conditions if needed.
- Click “Next” and select the desired actions for the rule, like “Move the item to folder” and choosing the designated folder.
- Click “Finish” to complete the rule creation process.
John, a busy professional, used this method to automatically sort flagged emails in Outlook. He set up a rule that moved all flagged emails to a designated folder for follow up. This helped him prioritize important tasks and avoid overlooking any emails. By using this rule, John stayed organized and increased productivity, as he could easily find and address flagged emails in the designated folder without wasting time searching through his inbox. This simple yet effective method streamlined his email management and allowed him to focus on important tasks.
- About the Author
- Latest Posts
Janina is a technical editor at Text-Center.com and loves to write about computer technology and latest trends in information technology. She also works for Biteno.com.

