Unlocking Remote Access: How to SSH into Raspberry Pi from Anywhere
Understanding SSH and Raspberry Pi
As we embark on our journey into the realm of Raspberry Pi and Secure Shell (SSH), it’s essential to familiarize ourselves with the fundamental concepts.What is SSH?
SSH, which stands for Secure Shell, is a network protocol that provides a secure method for remote login from one system to another. By employing an encryption mechanism, SSH ensures that all communication travels safely over an unsecured network. Thus, it prevents password theft and protects against potential eavesdropping by malicious parties.What is Raspberry Pi?
The Raspberry Pi is a credit-card-sized computer that plugs into your TV or monitor and uses a keyboard and mouse. It’s a capable, compact device that enables people of all ages to explore computing and learn how to program in languages like Scratch and Python. Raspberry Pi’s affordability and accessibility have quickly made it a favorite among hobbyists and professionals alike.How does SSH work with Raspberry Pi?
SSH provides us with a secure means of accessing your Raspberry Pi device remotely over a network. You have the ability to run terminal commands as if you were physically connected to your Raspberry Pi unit which provides immense flexibility. Whether it’s file management, software installation, or configuration tasks, SSH enables you to administer them remotely.Setting Up Your Raspberry Pi for SSH
When preparing your Raspberry Pi for SSH, certain steps are necessary to ensure successful setup and secure connections.Important tools and requirements
Before attempting to set up SSH, we require some essential tools and connections. A microSD card loaded with a Raspberry Pi operating system such as Raspbian, a power supply, a network cable (for the internet connection), and a Raspberry Pi unit are all requirements.Connecting Raspberry Pi to the internet
To enable SSH, our Raspberry Pi unit needs an active internet connection. You can opt for a wired connection using an ethernet cable, or a wireless connection if your Raspberry Pi supports WiFi.Enabling the SSH on Raspberry Pi
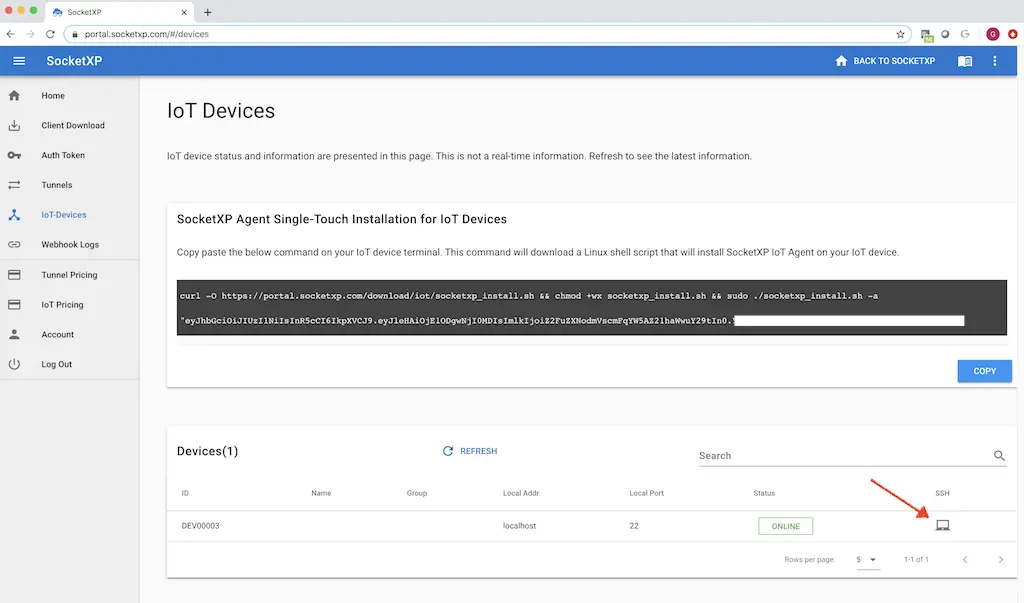
Once connected to the internet, the next critical step is enabling SSH on the Raspberry Pi. This can be done either through the Raspberry Pi configuration settings or by using terminal commands.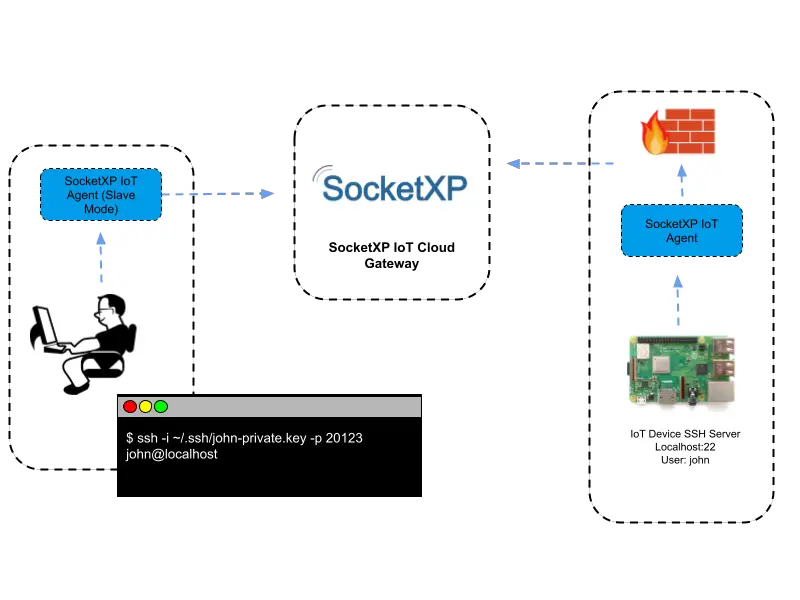
This image is property of www.socketxp.com.
Obtaining Raspberry Pi’s IP Address
To establish an SSH connection to your Raspberry Pi, we need to know its IP address.Methods to find Raspberry Pi’s IP address
There are several ways to do this. You can execute a hostname command on the Raspberry Pi itself, or you can check the list of devices connected to your router.Why it is necessary to know the IP Address?
Knowing the IP address is crucial because it serves as the unique identifier of your Raspberry Pi on the network. Without it, our SSH client wouldn’t know where to direct the SSH requests.Installing SSH Client on Your Device
To use SSH, we need to install an SSH client on our device.SSH clients for Windows
For Windows users, PuTTY is a popular and free SSH client. It is user-friendly and widely used due to its robust functionality.SSH clients for Mac
Mac users have an easier time as the Terminal application that comes pre-installed on all MacOS systems has built-in SSH functionality.SSH clients for Linux
Likewise, Linux users can use the terminal application that comes with their distribution. SSH is typically pre-installed on most Linux distributions.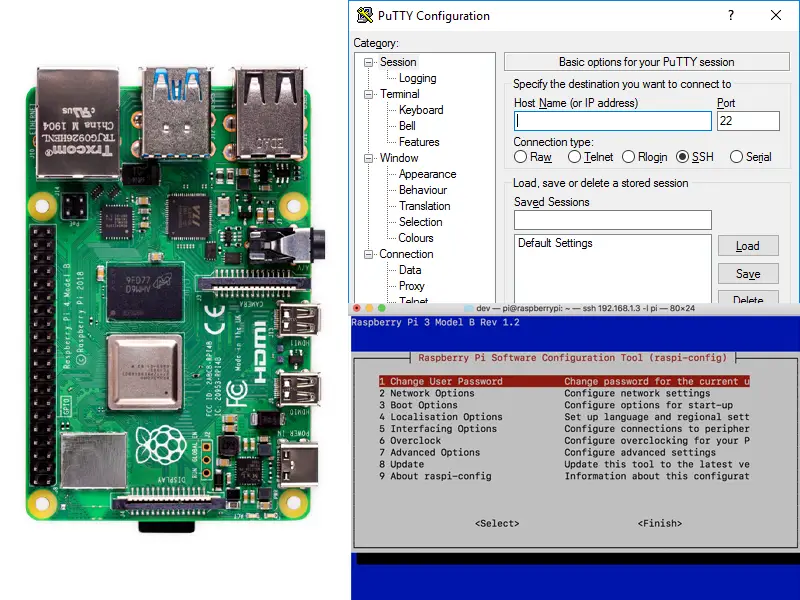
This image is property of tunnelin.com.
Setting Up SSH Connection to Raspberry Pi Locally
Once we have our SSH client installed, we can establish a connection to our Raspberry Pi.SSH command syntax
The syntax for the SSH command is “ssh [user]@[ip address]”. “User” is our username on the Raspberry Pi, and “ip address” is the Raspberry Pi’s IP address we earlier retrieved.First SSH connection attempt
Upon our first SSH connection attempt, we’ll be asked to accept the Raspberry Pi’s RSA fingerprint as a security measure.Dealing with possible errors
Errors may occur, but they can usually be resolved by troubleshooting network connections or rechecking SSH setup procedures.Securing Your SSH Connection
After setting up the basic connection, we must take measures to secure our SSH connection.Change default Raspberry Pi username and password
First, we need to change the default Raspberry Pi username and password as it is a well-known target for hackers.Disabling password login for SSH
For additional security, we can disable password login for SSH, which may prevent brute-force password attacks.Using SSH keys for enhanced security
SSH keys can provide greater security than traditional passwords. By generating a pair of keys and installing one on the Raspberry Pi, we can authenticate your identity securely.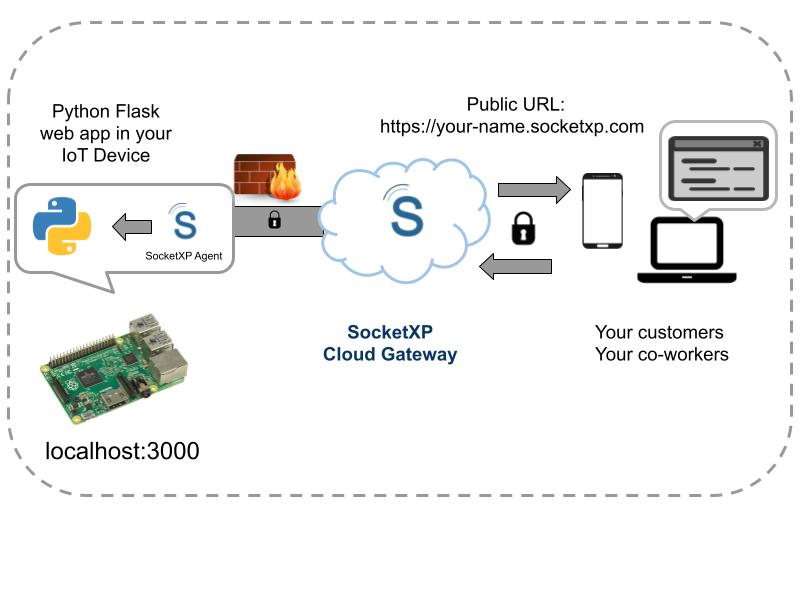
This image is property of www.socketxp.com.
Connecting to Raspberry Pi from Anywhere
Enabling remote access adds flexibility, but we need to understand and implement port forwarding.Understanding Port Forwarding
Port forwarding allows external devices to access services on private networks. It’s like creating a direct line from the outside network to your Raspberry Pi.Setting up Port Forwarding on your router
To setup port forwarding, you need to access your router’s configuration menu, which is typically accessible via your web browser.Using Dynamic DNS Services
Dynamic DNS services enable us to connect to our Raspberry Pi using a friendly URL instead of an IP address.What is Dynamic DNS?
Dynamic DNS (DDNS) is a method of automatically updating a domain name server with our network’s IP address, which often changes when we’re not using a static IP.Setting up Dynamic DNS service
Setting up a DDNS service usually involves registering for a provider, installing their software on your Raspberry Pi, and configuring the settings to match your network.Why use a Dynamic DNS service?
Using a DDNS service makes it easy to remotely connect to our Raspberry Pi, especially if we don’t have a static IP or our IP address frequently changes.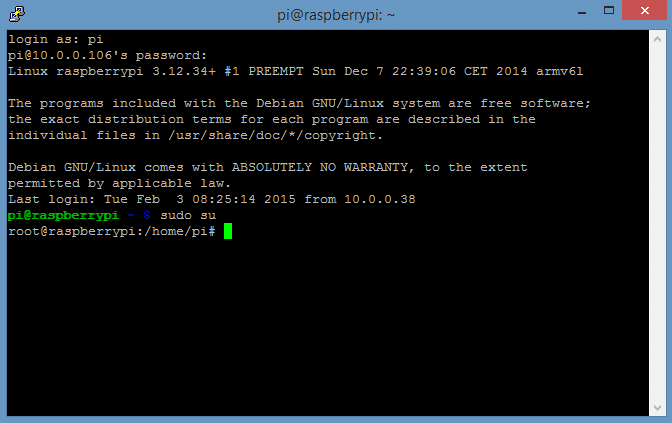
This image is property of www.socketxp.com.
Automating the SSH Connection Process
Once connections are secured and optimized, we can automate the SSH connection process.Using scripts to automate SSH connection
We can write scripts that automatically start an SSH connection, saving time and simplifying the connection process.Using SSH configuration files for quick access
SSH configuration files can be set up with aliasing and automatic commands to streamline and expedite our access to the Raspberry Pi.What Steps Should I Follow to SSH into Raspberry Pi Over the Internet?
To SSH into a Raspberry Pi over the internet, you need to follow a few steps. First, enable SSH on your Pi by accessing the Raspi-config menu and selecting Interfacing Options. Next, note your Pi’s IP address. Open the terminal on your local device and enter ssh pi@
Troubleshooting Common SSH Problems
Despite our best efforts, we may still encounter issues while trying to connect via SSH.Network issues
Network issues are common culprits. They can range from Wi-Fi instability to firewall restrictions and can be resolved by thorough troubleshooting of our network setup.Permission errors
Permission errors can occur if we’re using an incorrect username or if file permissions have been incorrectly set.SSH client or server configuration issues
Lastly, SSH client or server configuration issues can lead to unsuccessful connections. Here, our logs and error messages are a valuable resource for identifying and resolving the problem. Having an SSH connection to our Raspberry Pi device gives us flexibility and opens up new possibilities for using our device. It helps us troubleshoot issues, manage files, and even run programs on our Raspberry Pi from anywhere in the world.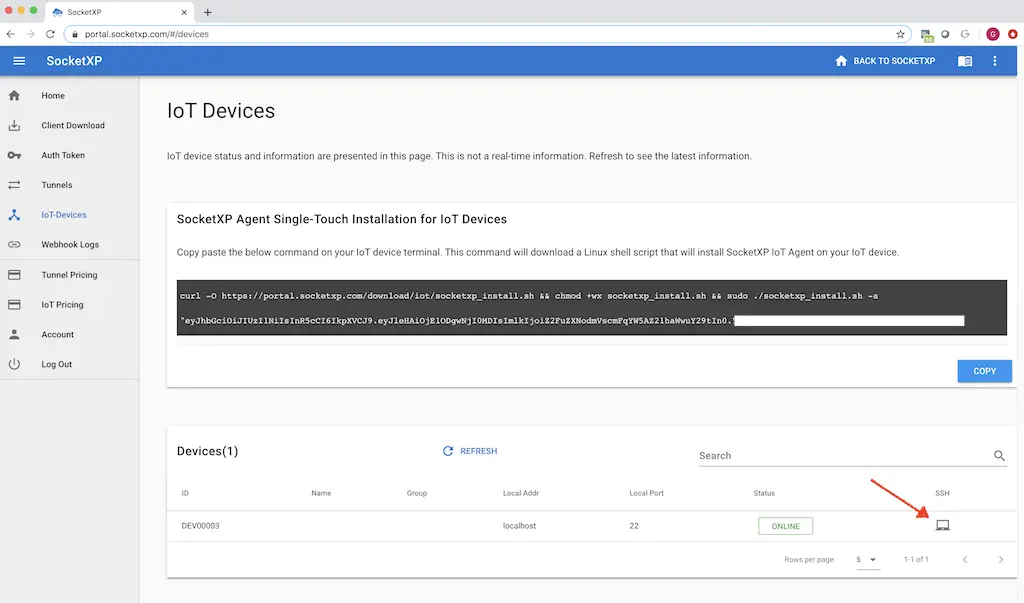
This image is property of www.socketxp.com.
- About the Author
- Latest Posts
Mark is a senior content editor at Text-Center.com and has more than 20 years of experience with linux and windows operating systems. He also writes for Biteno.com
